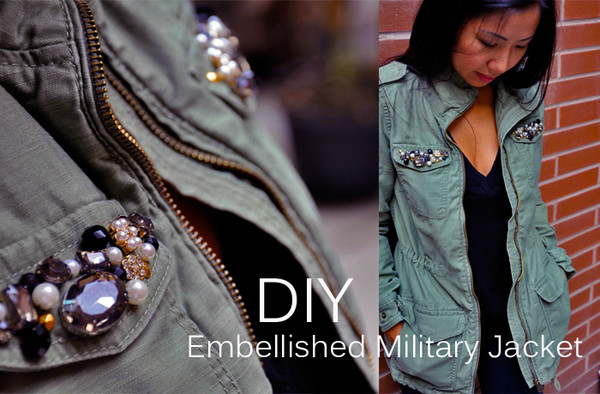
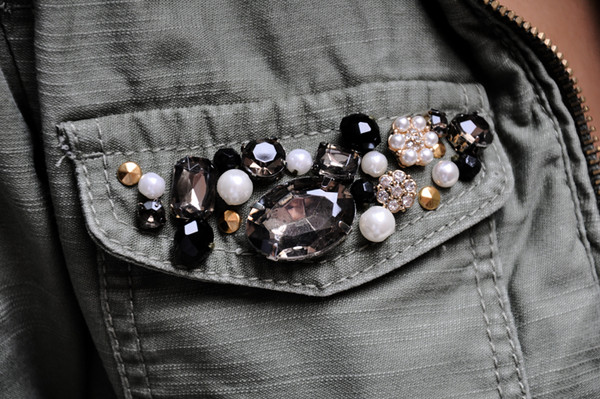
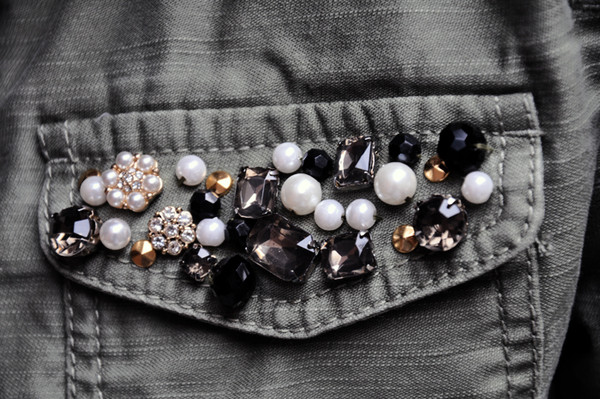
I am a big fan of army print and military green. When I saw those favourite patterns and colours embellished with sparkly things, my eyes twinkled. I was uber excited. Once again, a stop into my favorite store Zara, had my DIY radar going off – I was inspired by this and this version. So I decided to take my own spin to my army green military jacket.

I didn’t get a chance to document the step by step process to this DIY, so I’ll just have to write down the instructions and showcase photos of the final products, very sorry! But if you have any questions, please ask!
What you will need:
- a military or army jacket (I got mine at H&M which is no longer in stock, but similar version here and LOVE this version here)
- assorted jewels and embellishments (I used some jewels from an old shirt I took apart AND I bought earring studs from Forever21, similar sets found here and here, earring stud sets are perfect as jewels!)
- assorted proned studs (I got mine from a local craft store)
- assorted pearls (I got mine from Michael’s)
- needle and thread (preferably thread to match the color of your jacket)
Step one – start by separating your jewels, studs, etc. to ensure you have enough for both pocket flaps. Don’t worry about making your pocket flaps with a even design, it will save you a lot time! Work your way from one pocket to the next.
Step two – prepare your needle and thread. I started with sewing on the largest jewels first.
Step three – I then continued with my earrings, I pierced each through, secured with backing, then used a set of small pliers and folded the ends down so that they are not poking through.
Step four – continue your way with the other embellishments, make sure you fill the gaps with small items.
Step five – repeat on the other side.

Tip – Make sure you tie your threads tight and ensure to not just use ONE piece of thread all the way through in case if thread comes undone, all your embellishments won’t fall out!
As simple as that! Try embellishing the collars, sleeve ends or the inside flap of your jacket! Let me know how it turns out, I’d love to here from you!
Thanks for reading!


1 comment
[…] Click here to view the tutorial […]