Hello! Hope you’re all having a great week so far! Some personal good news to share, after months of searching for a new home, we finally found our first house in The Beaches! We are so excited (let me tell you I already started to plan my home decor ideas!).
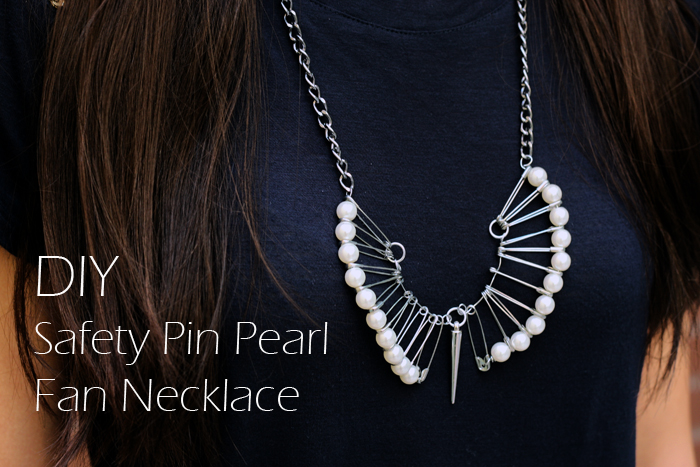
It’s been a couple of weeks since I posted a DIY project, I had what I call ‘DIY Block’ over the weekend. I absolutely racked my brain to think of a new project to share with you. Alas! I came up with this DIY Safety Pin Pearl Fan Necklace, inspired by Tom Binns and also this necklace from Anthropologie. I hope you like it!
The best DIY’s are those that utilize the everyday items you may already have at home. A pack of safety pins only cost about a dollar!
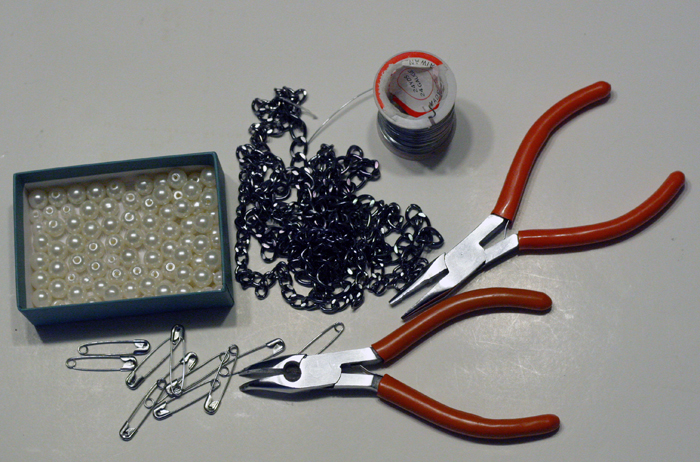
- 20-30 safety pins (medium to large size)
- 20-30 pearls
- Wire
- A chain
- Charm (optional)
- Plyers
- Scissors
- Jump rings (larger in size)
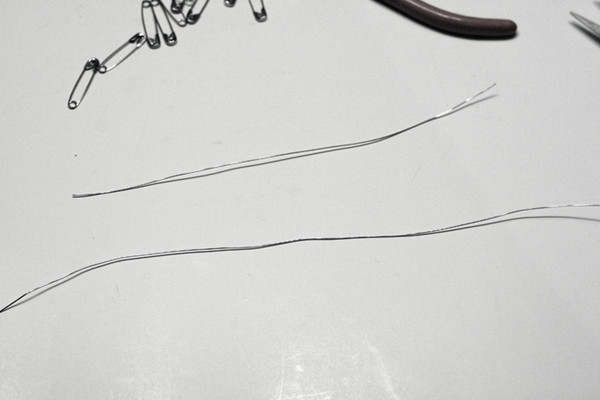
1. Cut two pieces of wire, one about 6 inches long and the other double it’s length.
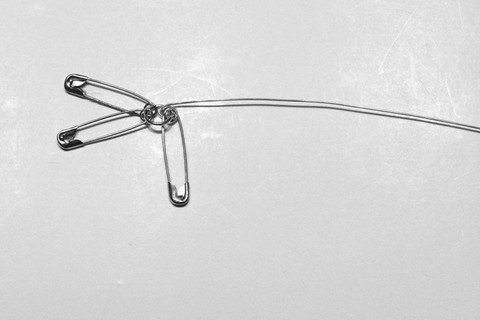
2. Take the shorter piece of wire, using plyers, create a loop shape at one end.
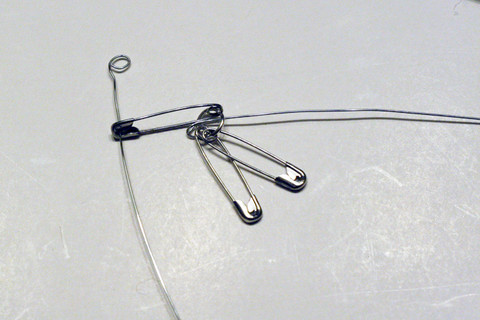
3. Insert 3 safety pins and the shorter piece of wire through a jump ring as shown below.
3. Take the longer piece of wire, and again, create a end loop as shown below.
4. Insert the other end of the first safety pin from the shorter wire through the longer wire.
5. Continue by inserting a pearl through the longer piece of wire.
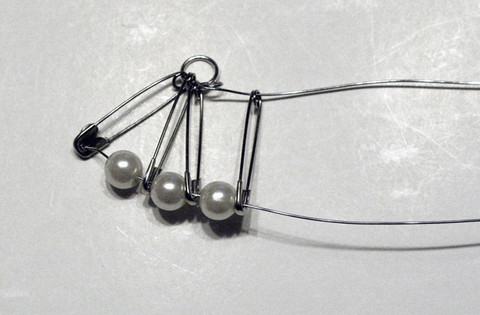
6. Repeat steps, interchanging a safety pin then a pearl for the first 3 safety pins.
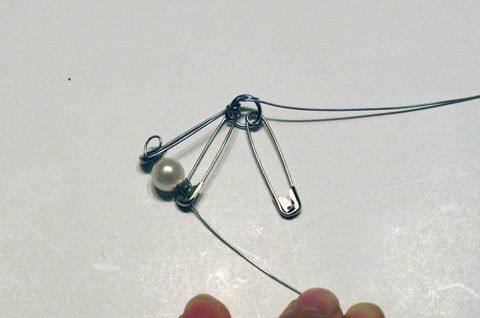
7. Once you have worked through the first 3 safety pins, continue to string both ends of a safety pin through both wires and only inserting a pearl through the longer wire.
8. Repeat until you have stringed through 10 pearls. (you may choose to use more or less depending on your desire)
9. Take both ends of the excess wire and fold back to create the fan half shape you want.
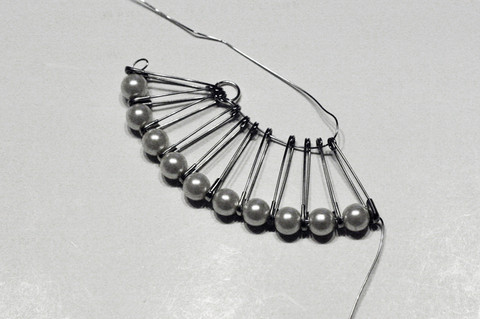
10. Cut the ends of the wires leaving only about one inch left on each end.
11. Work on the longer wire first, take a set of plyers and wrap the excess wire around several times.
12. With the shorter wire, wrap the excess wire around several times but this time, you also want to create a loop at the end.
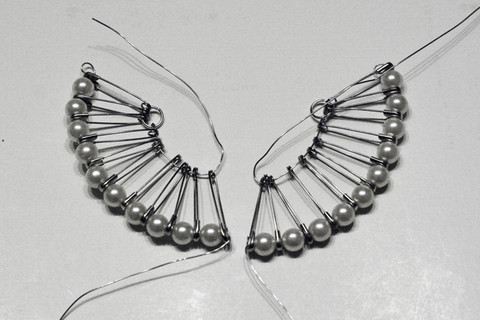
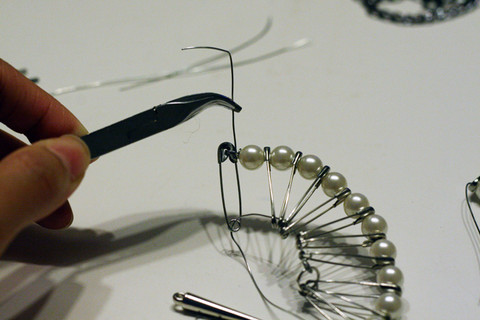
You can see the loop shape created on the shorter wire’s end.
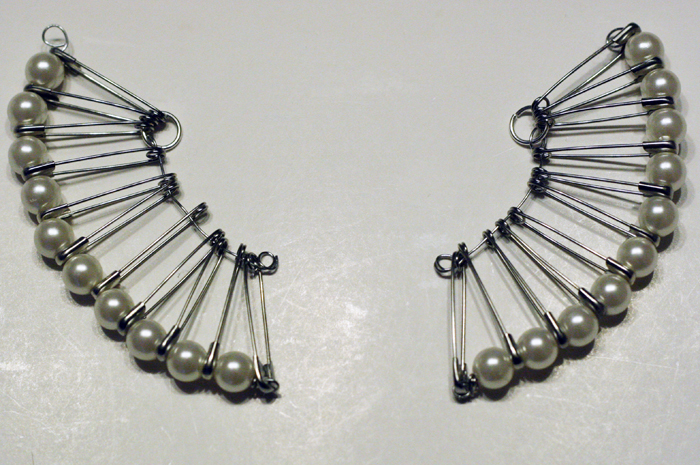
13. Attach a chain with jump rings to the pearl ends.
14. Attach the two fan halves with either a charm (I used spike charm) or you can attach them together by just using a jump ring.
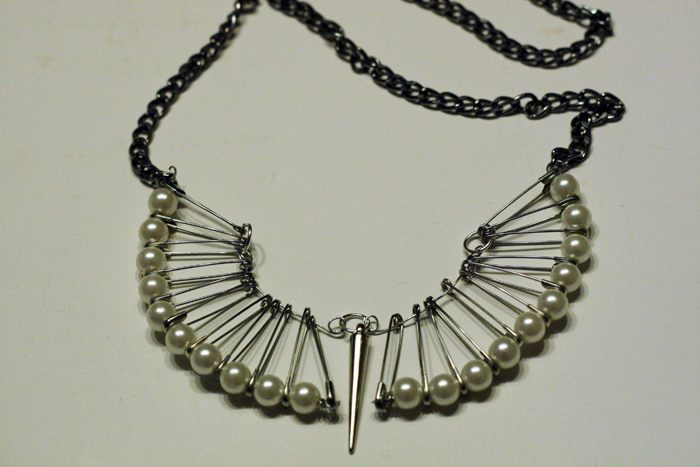
Here is the final product!

Feel free to experiment with other beads and using gold safety pins! I think it will look fabulous. What other variations can you think of?
I’m very happy with the way this turned out and definitely adds as an interesting piece to my wardrobe.
Thanks for stopping by. I hope you have a wonderful day! Check back soon for more DIY projects and an upcoming shoe giveaway!

6 comments
Omg what a great idea.. So creative. Definitely going to have to try this out. I create a lot of DIY necklaces, and I know a great website to get accessories for necklaces from called M&JTrimming.com. So if you want to check it out here’s the URL:
http://www.mjtrim.com/accessories.html
Thanks for this super cute idea!
If some one desires to be updated with newest technologies therefore he
must be pay a quick visit this web page and be up to date every day.
Clever design – I couldn’t tell that safety pins were used!
This is such an original DIy First time I’ve seen one like it online
[…] Image: mylittlesecrets.ca […]
[…] Image: mylittlesecrets.ca […]