Before giving birth to Everett, our second-floor bathroom was rarely in use. It was typically reserved for the occasional overnight guest or if I fancied a weekend bath soak since we had gotten rid of the tub in our ensuite. When we anticipated the arrival of our little one, we knew the guest bath would soon become his. A bathroom upgrade was in order but with so much additional expenses on the way, it had to be a smart budget renovation.
Deciding what to splurge on and what to save on any renovation can be difficult. It’s so easy to overspend and make unnecessary purchases. Luckily, having renovated the house a bit at a time over the last few years, I’ve personally learnt to spend on the things that are most functional and well, that also brings the most joy!
Perhaps a renovation is not feasible as we are faced with this Covid-19 pandemic at the moment but know that we WILL get through this together and in the meantime I hope these tips will get you geared up and ready to go on your future bathroom project or inspire you to do a bit of painting or DIYs while you’re staying at home!
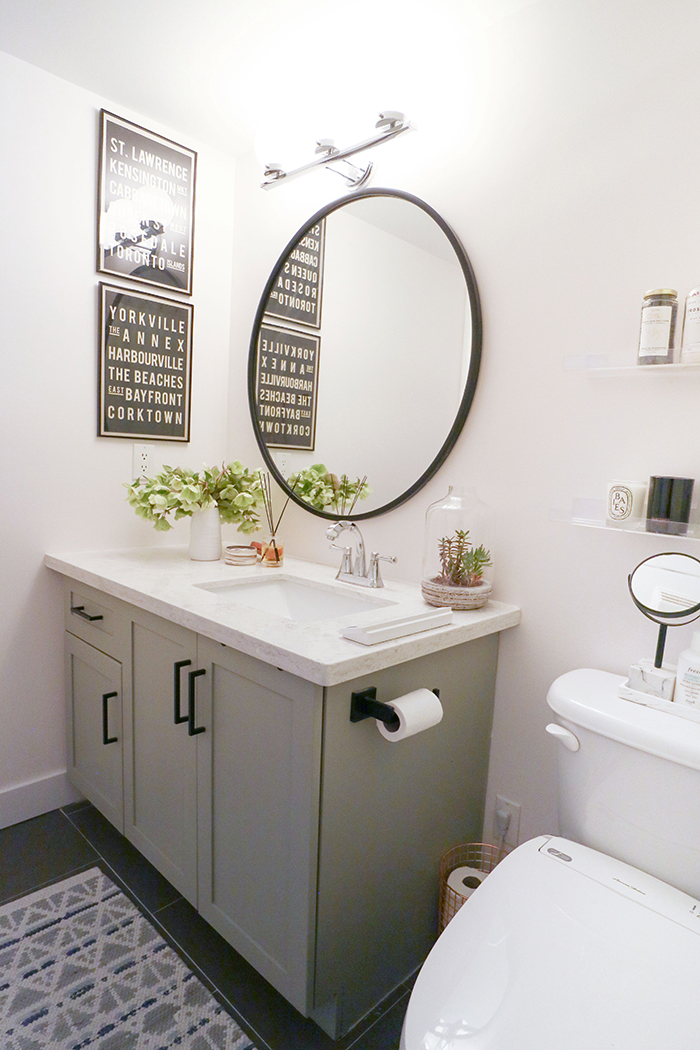
The bathroom was primarily functional and in decent shape. Right off the bat, we had decided to keep the major items intact, such as the tub, sink, faucets and vanity counter (we had that replaced with excess stone leftover from our kitchen renovation) to keep costs down. Our wish list included a paint refresh, replacing the floor tiles, improving the vanity, resealing the existing bathtub, adding lighting, upgrading to a spa-like toilet, and modernizing the overall style.
Here are a few key splurge vs. save decisions we made that kept us within our budget while achieving all the upgrades on our list.
Splurges:
Bidet Seat
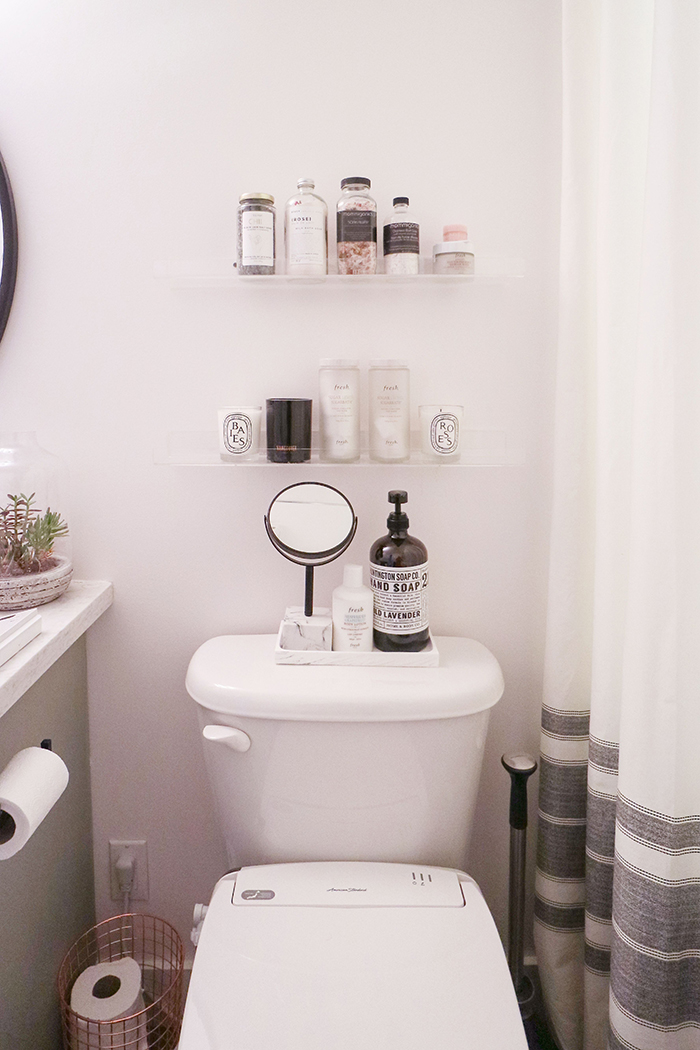
Since we decided to keep all the major items in the bathroom, I had really hoped at the minimum to upgrade the toilet. The seat was worn out and quite uncomfortable. I had been contemplating those fancy all-in-one toilets, you know the ones with built-in water washing, temperature control, and heated seat functionality? But then I quickly got intimated with replacing the unit and well, the price! The timing was perfect when American Standard Canada reached out to offer me the chance to try their newest Advanced Clean 3.0 SpaLet Bidet Seat.
The SpaLet Bidet Seat has so many features including self-cleaning dual nozzles, water temperature control, a heated seat with an adjustable temperature mode, and even a built-in warm air dryer. It is truly the perfect indulgence I had dreamt of without needing to completely overhaul the toilet area.
There are also numerous health benefits that come alongside a bidet seat. It promotes overall hygiene and helps relieve soreness and itch especially for those who may be suffering from a medical condition. As for my real-life experience, it was a life saver near the end of my pregnancy (let’s say some areas were just hard to reach when you’ve got a watermelon sitting on you!) and assisted me greatly in recovering from my caesarian section. If you’re interested in learning more on how this seat can offer relief for common pregnancy and postpartum conditions, head on over to my previous post here.
From a cost standpoint, though, I’ve listed it as a splurge item (but totally worthy of spending) the American Standard Advanced Clean 3.0 SpaLet Seat is a great alternative since it is comparably affordable then an all-in-one toilet without compromising the functionality, comfort, nor luxury factor!
The installation is very straight forward. In fact, Kyle handled this by viewing the installation video posted on the American Standard website which meant that we saved by not needing to account for any additional contractor expense. Just an important note to ensure an electric outlet is nearby to plug the unit in for use.
The Bidet Seat is currently on sale and can be found here.
Lighting
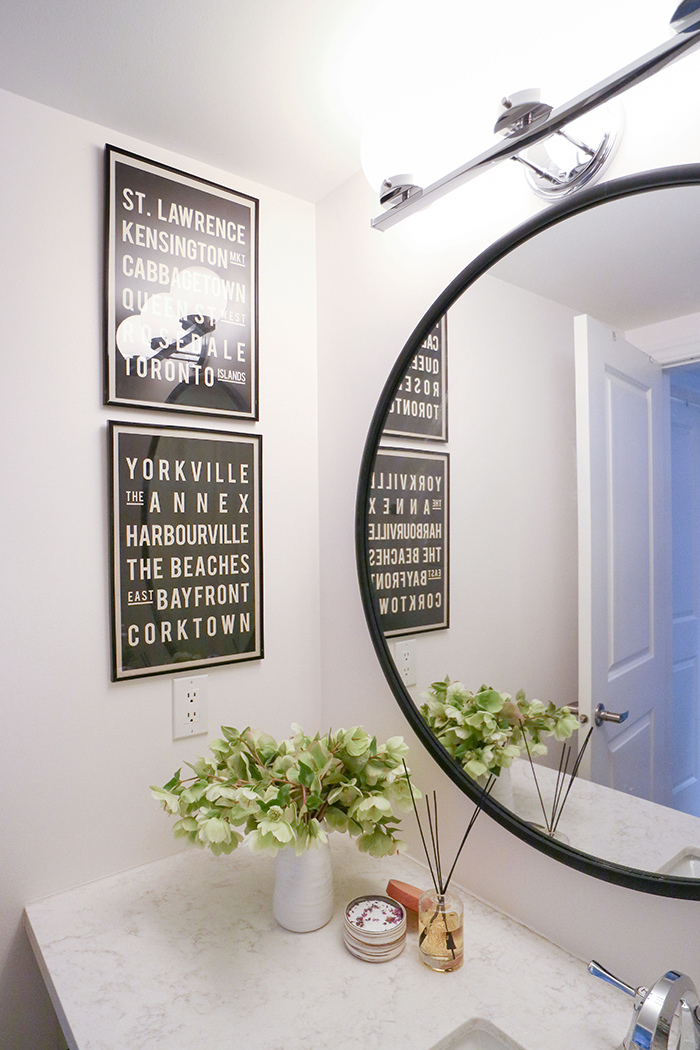
There are a wide range of options when it comes to lighting style and quality. I highly recommend spending a few more dollars in this category as cheap lighting tends to malfunction easily and you also don’t want to mess with anything electrical related in the bathroom. We replaced the original builder style bathroom bulb lighting with a new chrome fixture and also added a pot light in the shower area above the tub. This was to ensure we had plenty of lighting while bathing little Everett.
Paint
Pick the right type of paint and a high quality one for the bathroom. A lot of moisture is produced from showers and baths and if yours is like ours, where the space is small with no windows to let the moisture escape, mildew and mold can build up resulting in the paint to peel. The last thing you’d want after a renovation is to re-do the paint job a few months later. For our bathroom, we chose a line of paint that is specially formulated to be mold and peel-resistant. I envisioned that at some point in time little E may make a mess along the walls and therefore we also picked a semi-gloss finish for easy wipe downs and clean ups, which is generally more suitable for bathrooms.
Saves:
Painting the Vanity
I despised the look of our vanity. It wasn’t so much the function nor style but more so the wood finishing. It was a dark, yucky, chocolate brown. However, I must say that the quality of the vanity was very good. I had the same one replaced in our master and absolutely regret it in hindsight as the new one we installed is already chipping and wrecked after a couple of years. And that’s why, this time around, we opted to paint the vanity instead of purchasing a new one which would have cost us four times the price as we would have had to rip the countertop stone, sink and faucet out.
We chose a beautiful Eucalyptus colour from Jolie Paints. Their paints are water-based, non-toxic, low VOC and specially formulated to paint furniture, cabinets, floors and walls. These paints adhere to almost any surface WITHOUT the need to prime nor sand. YAY! Our contractor just applied two coats of this paint and one coat of the accompanying finishing wax to seal and protect the surface. The texture of the paint we chose is matte and chalky which I love.
I get lots of questions about painting vanities and cabinets. We did the same in our kitchen, it’s been five years, and everything still looks fantastic. The key to success in painting cabinetry is once again, choosing a quality suitable paint AND using a professional. It makes a world of difference to find a professional that knows how to do the job right. And depending on your budget, spraying costs more than hand painting, but it will eliminate paint streak marks. Of course, if you’re an avid DIY-er, approaching it yourself is definitely doable!
Floor Tiles
Unlike our master bath renovation, we opted out of marble, mosaics, and heated floors which can really add a few extra dollars signs to the overall budget. Instead, we selected large slabs of grey porcelain floor tile (12”x24”) from a big box home improvement store which cost us about just under $3.00 a square foot. Selecting a larger slab is also a simpler installation process which means more savings on the labour cost.

Above: Round Mirror (37″) / Jolie Chalk Paint Essential Kit / American Standard Advanced Clean 3.0 SpaLet Bidet Seat / 3 -Light Vanity Lighting / Matte Black Cabinet Pulls / Set of 3 Storage Baskets / Clear Shelving / Hand Soap & Hand Cream / Candle / Matching Bathmats / Tile
Overall, we are very pleased with this budget renovation and it only took three days to achieve. The bathroom is now utilized daily for Everett’s bath time and it is a much more functional and relaxing space.
I hope you found some of these tips helpful and if you’re embarking on your renovation soon, best of luck!
Disclaimer: This post was produced in partnership with American Standard Canada. All opinions and views are my own.


