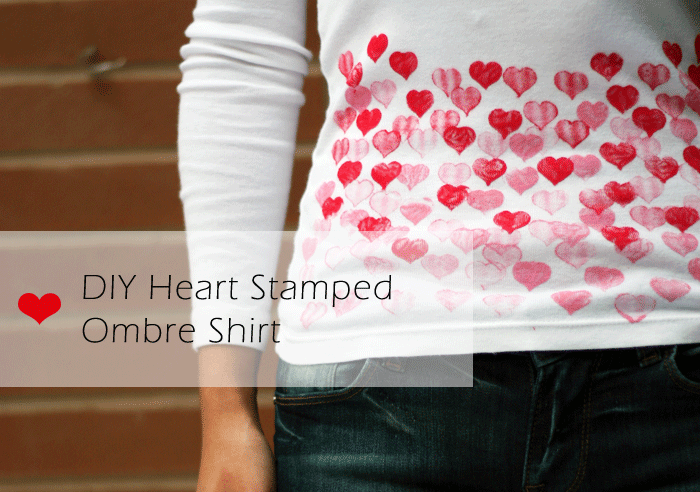
I originally created this DIY Heart Stamped Ombre Shirt for Fashion Parkway. However, soon after this project went live. Fashion Parkway shut down, therefore, it’s unfortunate that I don’t have the original tutorial. The steps of this project is super easy, I’ve outlined it for you here. I hope they make sense even without the step by step photos!
Many thanks!

What you’ll need:
- A cotton t-shirt
- Fabric paint in various shades of pinks and reds. I used one pink and one red, you can use white to mix colors
- A plate or tray for your paint
- Cardboard to line t-shirt and surface
- A heart stamp
Step 1: Line the inside of your shirt with a piece of cardboard to ensure paint does not go through to the back side of your shirt.
Step 2: Pour the lighter color paint you’re working with first onto the plate/tray, and apply it onto the heart stamp. Remove any excess by dabbing the stamp onto a surface several times. However, ensure there is a consistent layer of paint on the stamp.
Step 3: Gently apply the stamp sparsely onto the shirt. Don’t worry about making perfect heart shapes. The idea is to create several layers and shades of color. After all we’re trying to create an ombre effect.
Step 4: Continue applying hearts sparsely with different weight of color.
Step 5: Work your way up and start to include darker shades of pink and red. I did about just under half way up my shirt.
Step 6: Wait for it to dry for 24 hours prior to washing and wearing (best to follow the paint bottle instructions) and here you have it!

3 comments
[…] Heart Stamped Ombre Shirt @ My Little Secrets […]
Love it!
[…] 10: DIY heart stamped ombre shirt. […]